First introduced in theaters back in 2012 with the release of Pixar’s acclaimed animated film Brave, Dolby Atmos is an object-based surround sound system that utilizes both rear and height speakers for an immersive three dimensional bubble around the listener. By giving mixers the ability to assign specific sounds to “objects,” the system is able to accurately reproduce a single mix across a multitude of differently sized multi-speaker arrays ranging from your typical 5.1 surround all the way to 9.1.6 (nine speakers at ear level, six in the ceiling, and one subwoofer).
For those who have neither the budget nor the inclination to construct a home theater with a multichannel speaker system, Dolby Atmos also has the ability to render a binaural approximation of the multi-speaker mix for consumption over headphones. Though the process certainly has its critics – many of which are the engineers and content creators in the professional sphere – it does offer a tantalizing glimpse of the true multichannel experience.
Though the system was originally designed for post-production and film sound, it quickly captured the attention of the music industry as well. For the longtime surround music fans who saw quadraphonic vinyl and 5.1 surround optical formats like Super Audio CD or DVD-Audio fade away with minimal public interest, perhaps the greatest allure of Dolby Atmos is the ability to stream the format (either over headphones or through a multichannel speaker system) using services such as Apple Music and Tidal. Since mid-2020, thousands of songs – both classic and modern – have been remixed in the format.
Atmos File Types
Much like 5.1 surround, there are a number of different codecs and file containers used to deliver Dolby Atmos content to consumers.
On the studio side, finished Atmos mixes are exported to a proprietary format called ADM BWF. A single ADM file can take up multiple gigabytes, depending on how many unique beds and objects the mixer has used. These files are not yet suitable for home theater playback and must be converted to another encoded format.
The most commonly used format for consumer delivery is Dolby Digital Plus (E-AC3) with Joint Object Coding, which contains a 5.1 bed plus object-oriented metadata at a bitrate of 768 kbps. This format is used for the Atmos content on Apple Music and Tidal, though it can also be embedded in an MP4 video file for direct playback through most Blu-Ray players as well as software media players like VLC or Kodi. The main advantage of these files is that they’re quite small – averaging around 20-30 megabytes without video – but the overall sound quality is affected in a negative way, particularly in the rear and height channels.
The more compelling format for audiophiles in Dolby TrueHD (MLP), which can hold a 7.1 bed plus object-oriented metadata with a significantly-higher bitrate of around 6000 mbps. This format is used for Atmos content on Blu-Ray disc, though it can also be embedded in an MKV video file for direct playback through some Blu-Ray players as well as via media player softwares like VLC or Kodi. These files average around ten times larger than an MP4 with E-AC3, offering listeners the full fidelity of Blu-Ray without the disc itself.
Required Software
- DAW (Pro-Tools, Logic, etc)
- Dolby Atmos Production Suite (Dolby Atmos Renderer, Dolby Audio Bridge)
Mix Session Setup
Though a number of other DAWs such as Logic Pro and Cubase support Dolby Atmos, be aware that this article is written from the perspective of a Pro Tools user on MacOS.
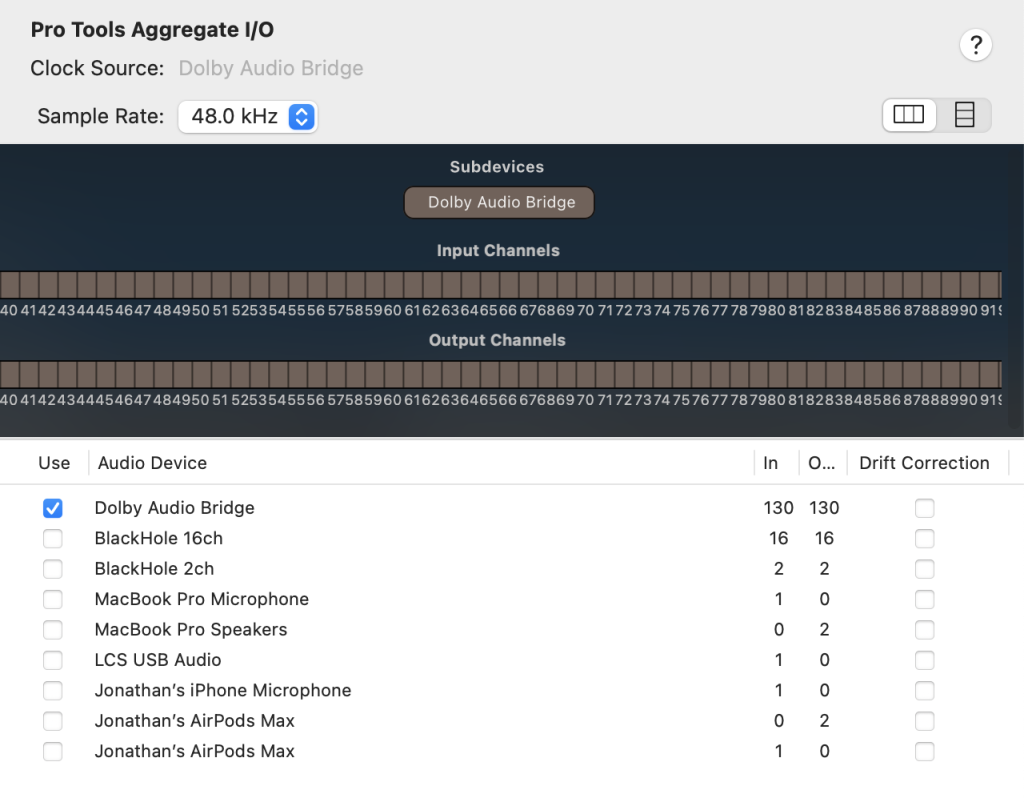
Upon purchase of the Dolby Atmos Production Suite, you’ll be asked to install two external pieces of software: the Dolby Atmos Renderer and the Dolby Audio Bridge.
The bridge acts as a virtual routing path for the 128 audio ‘objects’ from the DAW to the Renderer app. As such, you’ll want to make this the only audio device within your Pro Tools Aggregate device in the “Audio MIDI Setup” menu.
Next, open the Renderer and select the “Preferences” menu on the top left-hand corner. Under the “Drivers” tab on the left side, set your audio input device to the Dolby Audio Bridge and your output device to whatever interface is feeding your speakers (in my case, a Behringer UMC1820).

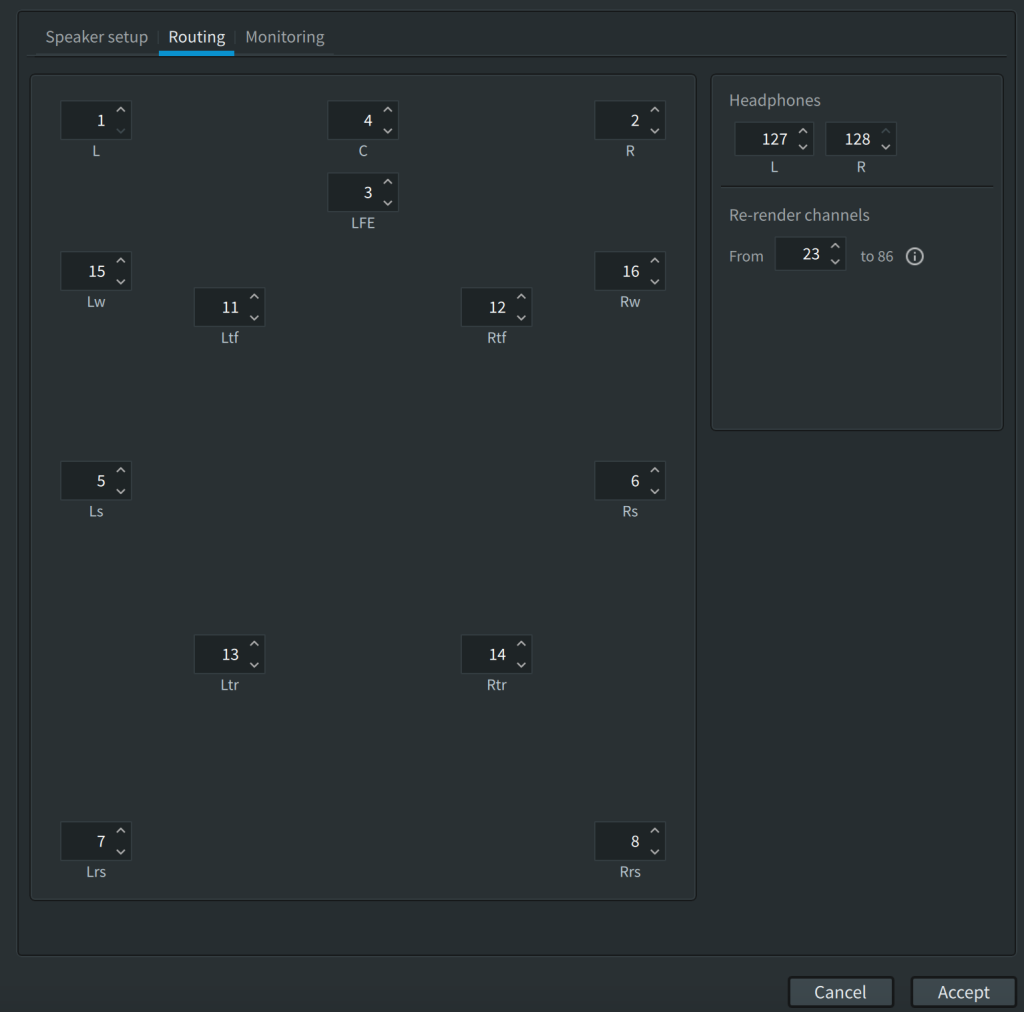
Next, hover over the “Window” menu and select “Room Setup”. From there, select the correct number of speakers in your setup and assign the proper outputs under the “Routing Tab”.
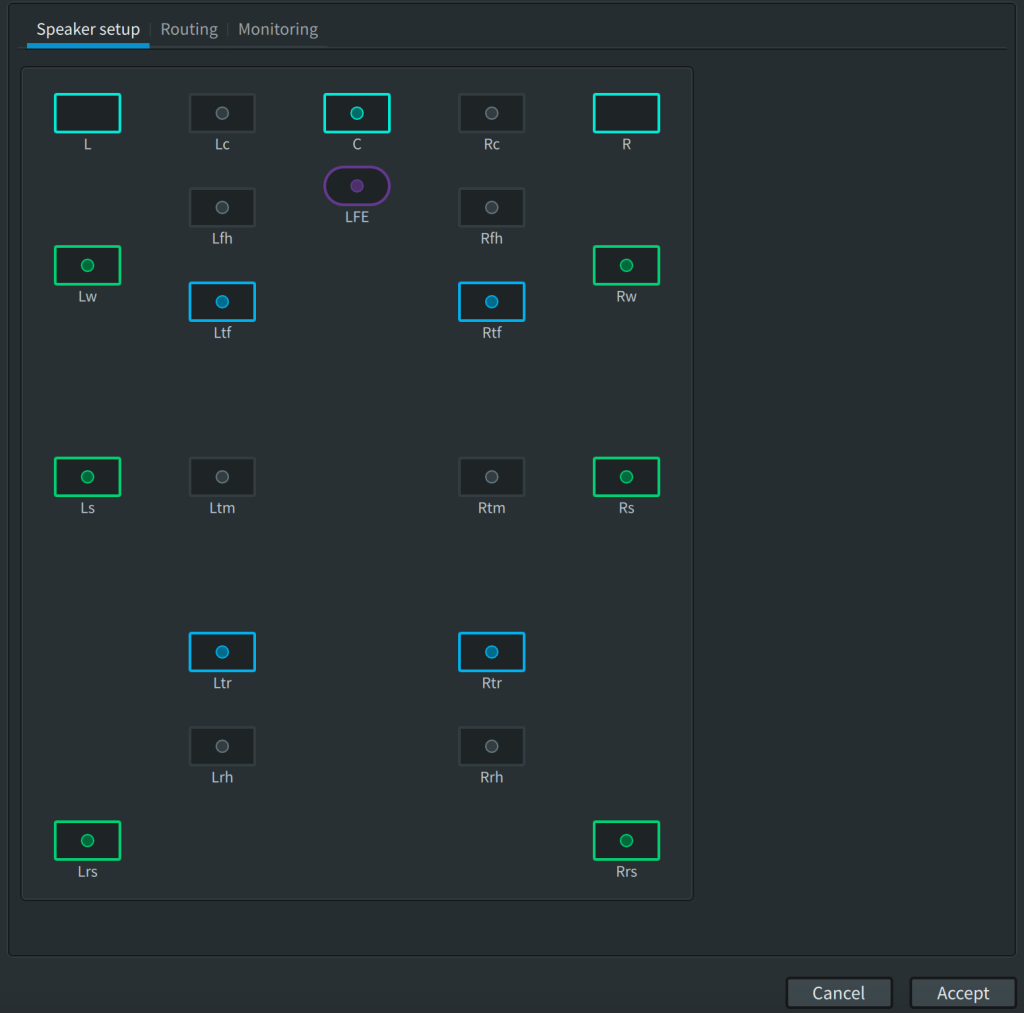
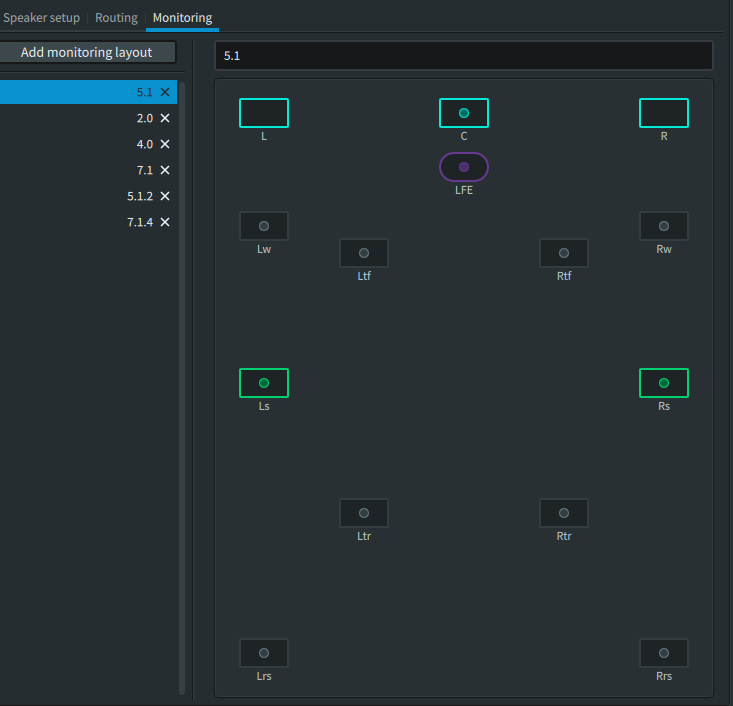
The “Monitoring” tab allows you to set a number of alternative layouts (5.1, 7.1, 5.1.2, etc). It’s very useful to toggle between these while mixing, to see how your Atmos mix fares with an alternative speaker layout.
Return to the “Window” tab and select “Input Configuration” from the drop-down menu. This is probably the trickiest part of the setup.
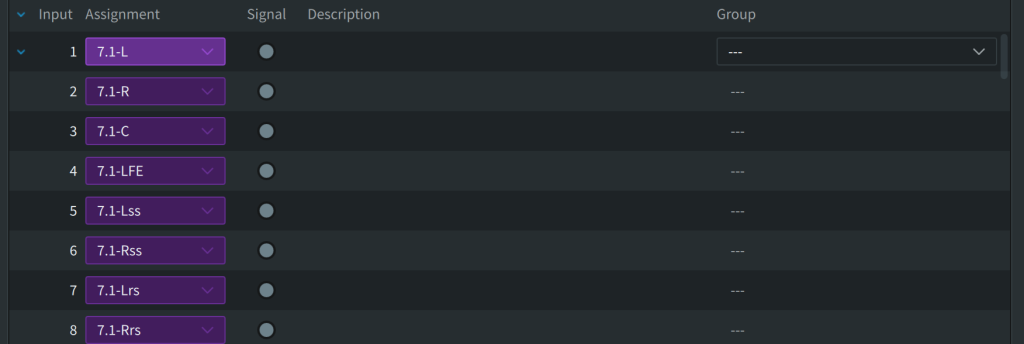
The inputs in this menu correspond directly to the outputs in the “I/O” setup checkerboard-like menu within Pro Tools. It is critical that your outputs there and inputs here match, otherwise your panning controls won’t work properly.
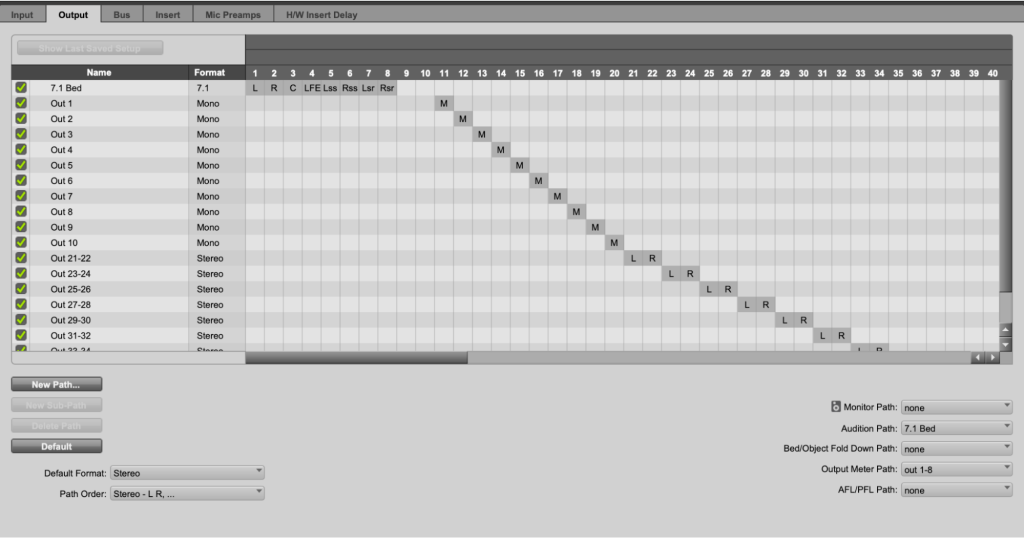
I elected to use the first eight outputs for a 7.1 bed, then 11-20 for ten mono objects and 21-40 for ten stereo objects. Inputs 9-10 are intentionally left blank, reserved for an additional stereo output if I choose to expand my bed to 7.1.2 configuration in the future.
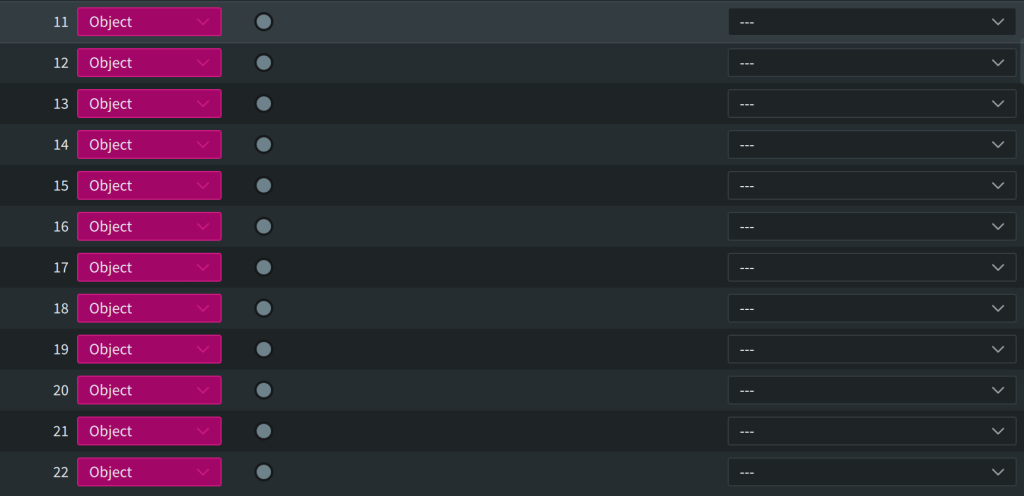
In the Pro Tools I/O window, be sure to assign the necessary outputs in the “map to renderer” column.
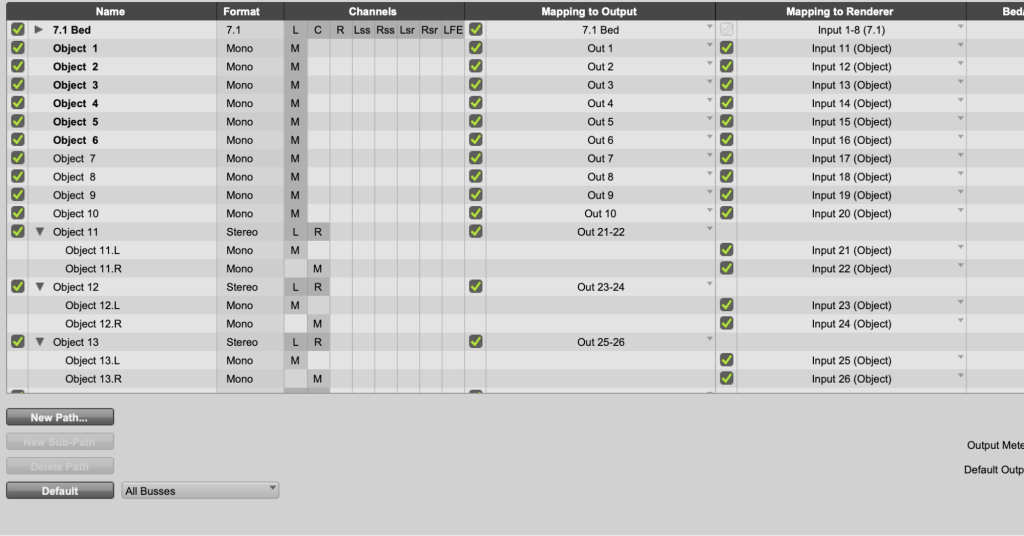
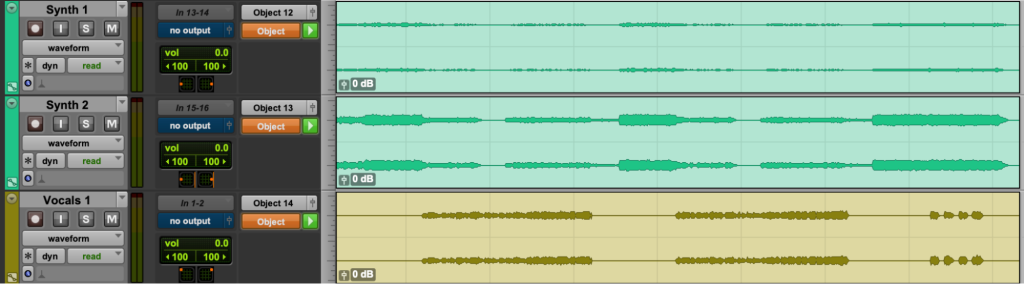
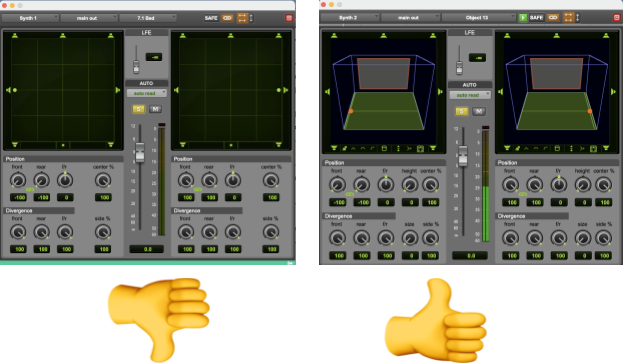
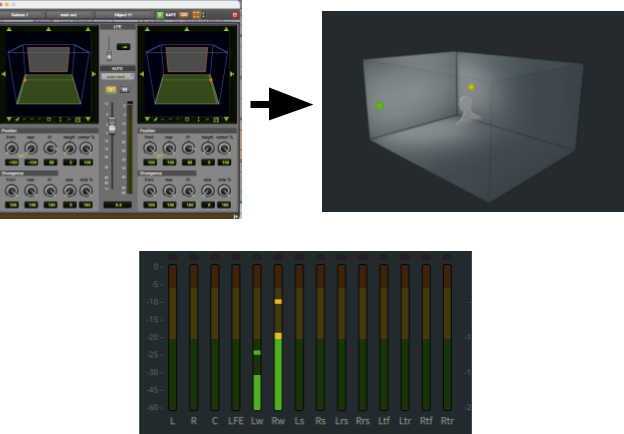
You may notice that Pro-Tools’ UI now includes an “object” setting directly beside the standard input and output boxes on each individual track, allowing the mixer to shift mono or stereo tracks from the bed to an object.
Once you assign one or more tracks to an object, you’ll notice that the surround panner will have shifted from a rectangular 5.1 or 7.1 configuration to a three-dimensional cube.

Understanding The Dolby Renderer
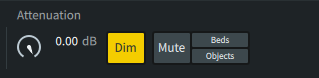
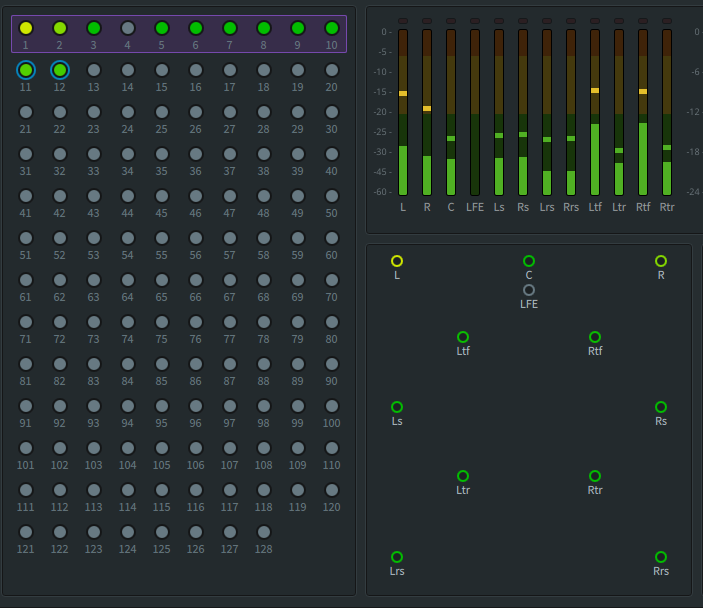
The top right-hand corner of the Dolby Renderer app display includes a ‘global’ volume control for monitoring (very useful if you’re using an aggregate device and multiple amps to drive all your speakers and mute/solo buttons for the beds and objects.
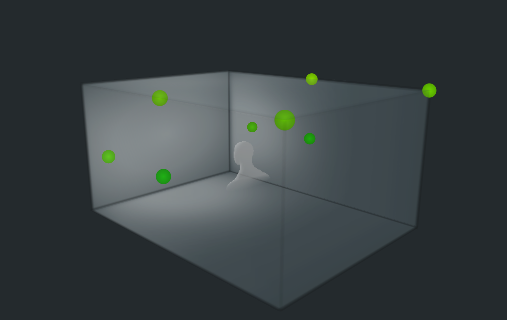
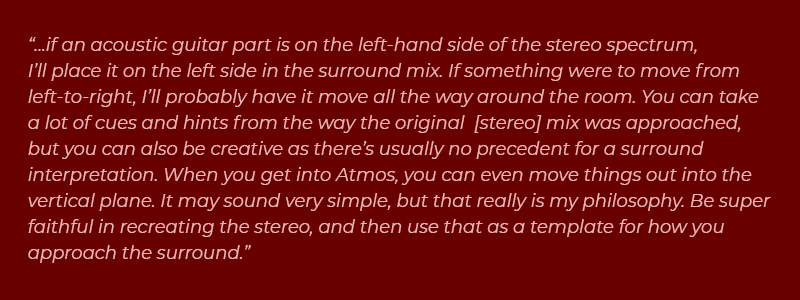
Also handy (and sometimes entertaining to watch) is the visual display on the bottom left-hand corner showing the placement and movement of individual objects. The image below shows a series of stereo objects panned to the ‘top middle’, rear height, side surround, and front wide positions–-all of which would be covered by physical speaker locations in a 9.1.6 setup.
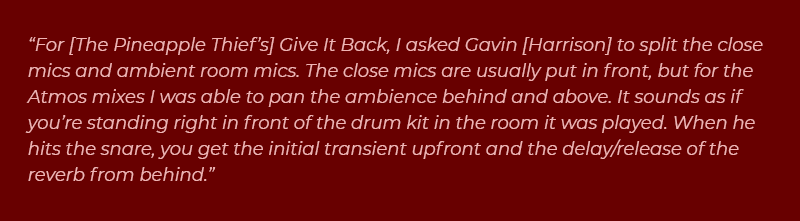
Towards the middle of the display, you’ll find a series of VU meters and loudness measurement indicators. Consider the multichannel display on the left equivalent to your master fader in Pro Tools. Since you cannot create a single bus within the DAW to cover the entire output (beds + objects), commonly used tools like mix bus compression or a limiter set to -0.1 to ‘catch’ stray peaks are currently unavailable.
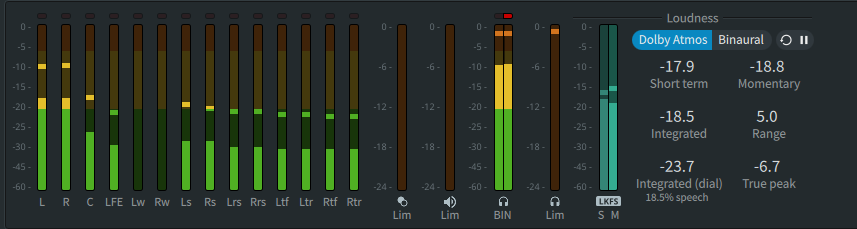
Finally, the displays on the left side show which of the 128 objects and individual speakers are playing based on whether they illuminate or not.
Miscellaneous Tips & Tricks
Though I’m still something of a novice to the world of Dolby Atmos–having only completed five or six mixes–I’ve come across a number of interesting features and/or helpful techniques.
Toggling between 5.1.4 & 7.1.4 configurations on the Renderer, it’s interesting seeing how the two side surround channels are treated based on whether the information directed towards them is channel-based or object-based.
If you pan to the sides within the 7.1 bed (channel-based), the fold-down to a 5.1.x configuration will collapse the side & rear channels into a single pair of rear speakers. However, if you instead mix objects to the sides, they appear more accurately in a ‘phantom’ center between the front & rear speakers in 5.1.x (side left = front left & rear left, side right = front right & rear right).
Though beds currently go up to 7.1.2–-7.1 surround at ear level and two ‘top middle’ heights, which render as a ‘phantom center’ between the front & rear heights in 7.1.4 (top middle left left = top front left & top rear left, top middle right = top front right & top rear right)--the only way to direct specific information to the front or rear heights separately is via objects.
The ‘wide’ speakers positioned between the front & side channels in a 9.1.x are completely inaccessible via beds, to engage them you must use objects. Interestingly enough, I discovered that panning an object at exactly 68% at ground-level using the Pro Tools surround panner is the only way to completely isolate information in those wide speakers.
Quotes From The Pros
Steven Wilson on remixing classic albums:
Bruce Soord on separating dry & ambient signals:
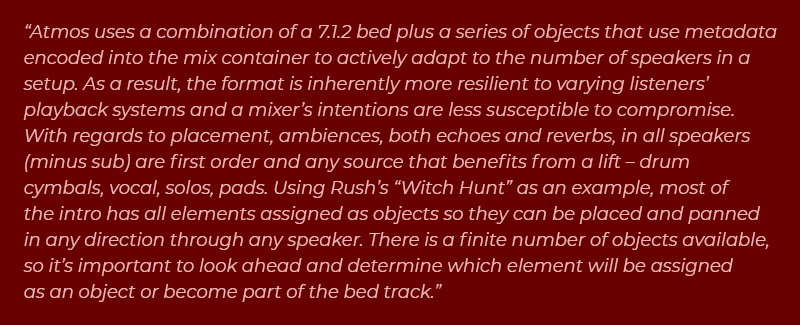
Nathaniel Reichman on beds & objects:
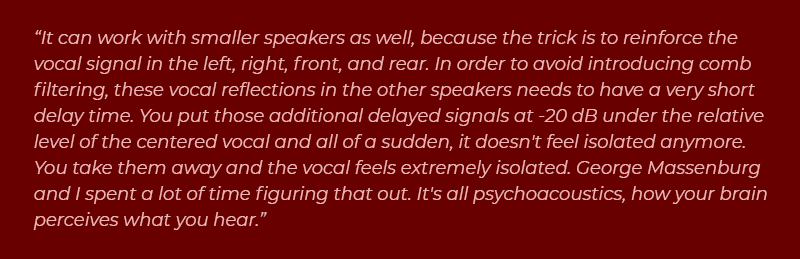
Ronald Prent on center-isolated vocals:
Richard Chycki on Atmos mixing techniques: